
As Shopify stores grow, product complexity increases. You start with a few variants, then add more colors, materials, sizes, and add-ons. Over time, what you’re really building is a system, but on the product page, it still shows up as a list of options.
That mismatch is where things start to break. Baymard Institute’s research shows that over 70% of ecommerce users abandon their carts, often due to friction, complexity, or unclear decision-making during the buying process. The issue isn’t that users don’t have enough information; it’s that they can’t process it.
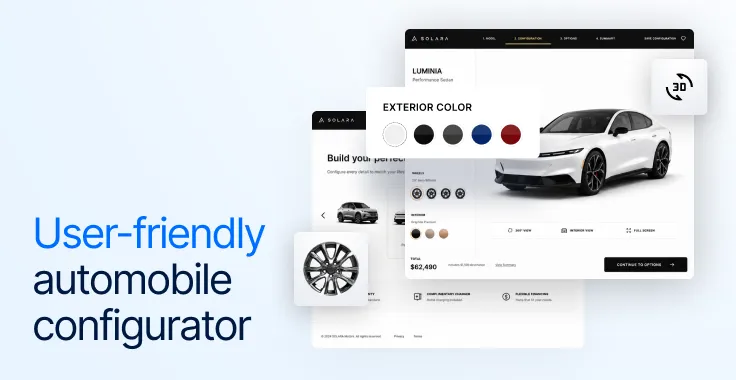
Static product pages force users to piece combinations together mentally, which creates uncertainty. 3D configurators remove that guesswork by letting users build and validate products in real time. But there’s a key difference. Adding a 3D model is easy, but building a photorealistic configurator that actually improves decisions is not, and that’s what this blog covers.
What is a photorealistic 3D configurator?
A 3D configurator is a system that allows customers to interact with a product in real time. Instead of selecting variants from dropdowns, they can:
- Rotate and zoom the product
- Change colors, materials, or components
- See those changes instantly reflected
Now, add photorealism to that. A photorealistic 3D configurator goes beyond interaction and focuses on the accuracy of representation. It uses:
- Physically accurate materials (PBR)
- Realistic lighting and shadows
- High-quality textures
- Correct scale and proportions
Why photorealistic configurators matter in 2026
1. Removes ambiguity
One of the biggest friction points in eCommerce is interpretation. When a customer reads something like “walnut finish with black legs,” they’re translating that mentally, and that translation is often inaccurate. Static images don’t solve this either, because they only show fixed combinations. A photorealistic 3D configurator removes that guesswork entirely.
2. Simplifies complex products
As product complexity increases, traditional PDPs become harder to navigate. Multiple variants, nested options, and dependency rules quickly turn into a confusing experience. A configurator restructures this. Instead of forcing users to scan through combinations, it lets them build the product step by step, selecting options in a logical sequence.
3. Improves buying confidence
Confidence is what drives conversion, especially for higher-value or custom products. When users can see exactly what they’re configuring, accurately rendered and updated in real time, they’re less likely to second-guess their choice. This has a direct impact not just on conversions, but also on post-purchase satisfaction.
Step-by-step: How to build a photorealistic 3D configurator on Shopify
When we build 3D configurators at Magebit, we don’t think of it as “adding 3D to Shopify”. That framing is misleading.
What you’re building is a layer that sits between the product and the checkout, translating user decisions into a visual, logical, and purchasable outcome in real time. That means the process is not linear, and it definitely doesn’t start with 3D. It starts with structure.
Step 1: Start by deconstructing the product (not designing it)
Before anything else, you need to step back and look at your product not as a SKU, but as something that is constructed from multiple decisions. This step is where you think in terms of product builder design principles.
If we take the example of the 3D product configurator that Magebit created for Selfnamed, what we really did was assist customers in choosing a product by helping them in deciding the:
- Type of container
- Size
- Label design
- Text or branding
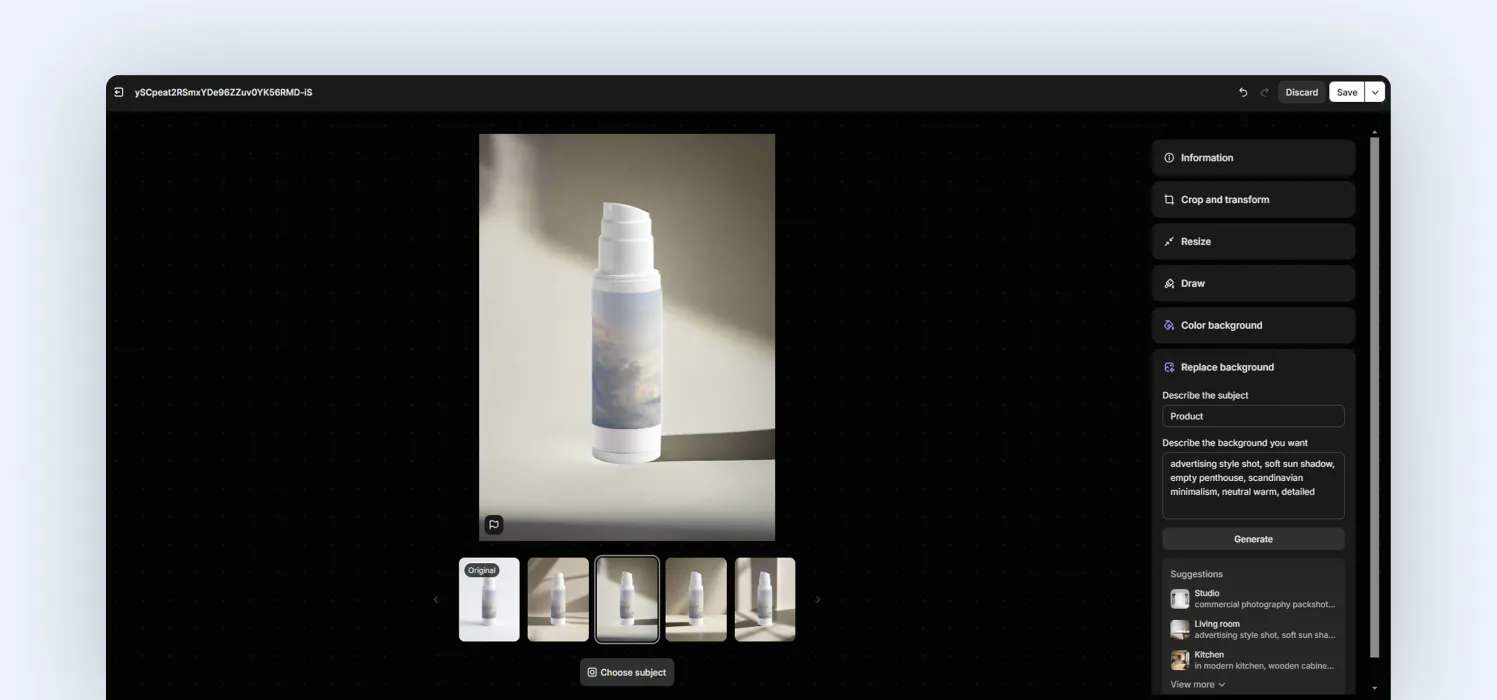
Each of these is a layer. And each layer affects the outcome. So instead of thinking, “we have 50 variants”, you start thinking, “we have 4–5 decisions that combine to create a product”.
That shift is important because a configurator doesn’t display products; it builds them. If you don’t clearly define these building blocks upfront, everything later (3D, pricing, UX) becomes messy.
Step 2: Define the configurator logic as a system
Once the structure is clear, the next step is defining how those decisions behave. This is where configurators become real systems. You’re no longer just presenting options, you’re defining rules. At this stage, you need to define:
- Which combinations are valid
- Which selections affect others
- How pricing changes based on those combinations
This is where most teams go wrong. They list options, but don’t define how those options interact.
Take something like BMW’s car configurator. You can’t freely combine every engine, trim, and material. Certain features are only available with specific packages, some finishes depend on the selected model, and performance constraints limit what combinations are possible.
At the same time, every valid selection updates the car visually, with accurate materials, lighting, and reflections. If you don’t define this early, the configurator will still work, but it won’t hold up. You’ll start seeing invalid combinations, incorrect pricing, or outputs that don’t match what can actually be produced.
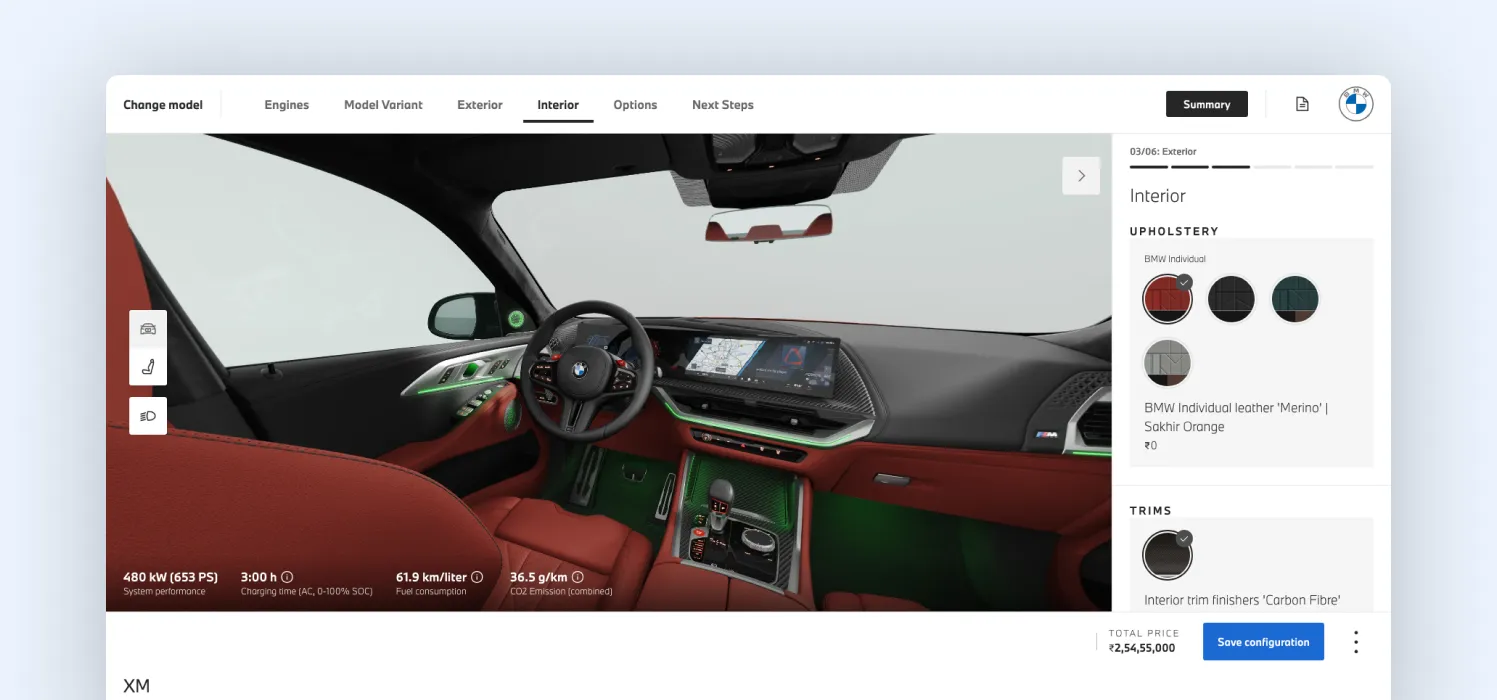
This is essentially a visual CPQ system (Configure, Price, Quote), even if the user never sees that complexity. And importantly, this needs to be solved before 3D. Because if the logic isn’t stable, the visuals will only mask deeper issues.
Step 3: Design the configuration flow
Once the logic is in place, the next step is figuring out how a user will move through all of this. At this step, you cannot expose too much, too quickly.
A good reference point here is the IKEA kitchen planner. When users design a kitchen, they’re not presented with every possible option at once. Instead, the experience is structured in a way that mirrors how people naturally think: start with the layout, then add cabinets, then customize finishes, and gradually refine the details.
At every stage, the system guides the user forward while showing a clear visual update of what’s being built.
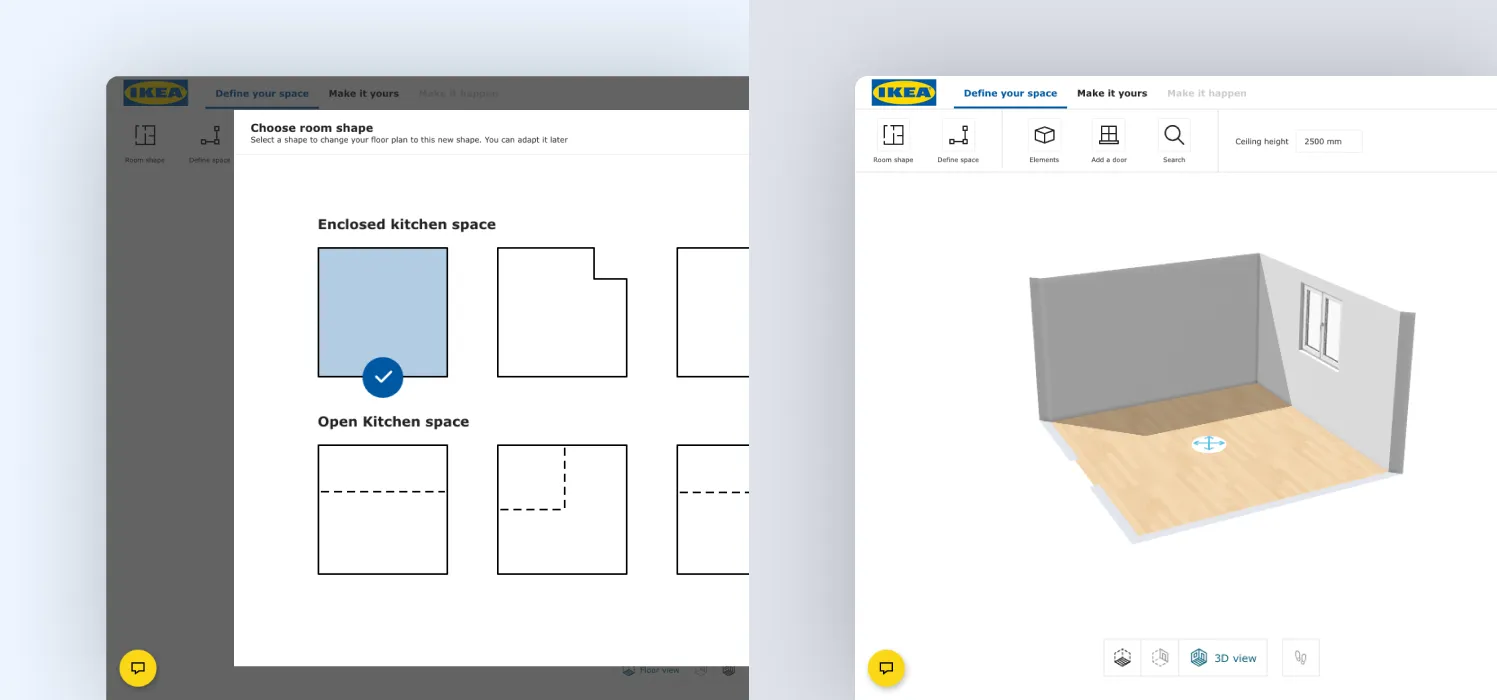
That’s the approach you want to take. Instead of treating the configurator like a tool with all options visible, you design it as a guided flow, where decisions are introduced in the right order and complexity is revealed gradually.
In practice, this means:
- Starting with the most defining choice (usually the base product)
- Introducing customization step by step
- Showing real-time visual feedback at every stage
What you’re really designing here is not just an interface, but a decision journey. The goal is to reduce friction by helping users move forward confidently, rather than making them figure everything out at once.
Step 4: Choose the right 3D configurator platform
Once your structure and flow are defined, you need to choose the platform that will power the configurator. This decision shapes everything that follows. Keep in mind that there isn’t a single best platform. The right choice depends on what you’re building.
For example:
- Twikit is often used in setups where you need dynamic product generation (like customized packaging or industrial components)
- VividWorks is commonly used in furniture and retail, where visual experience is a priority
Beyond these, there are other approaches as well, from full-service configurator platforms to custom builds using frameworks like Three.js or WebGPU.
Step 5: Build the 3D assets
With the platform in place, the next step is preparing your 3D assets so they work smoothly in the configurator. The key is to build for flexibility, not perfection.
A good way to understand this is by looking at Tylko. When users change dimensions, layouts, or colors, the product updates instantly without breaking. That works because the product is built in parts, not as one fixed model.
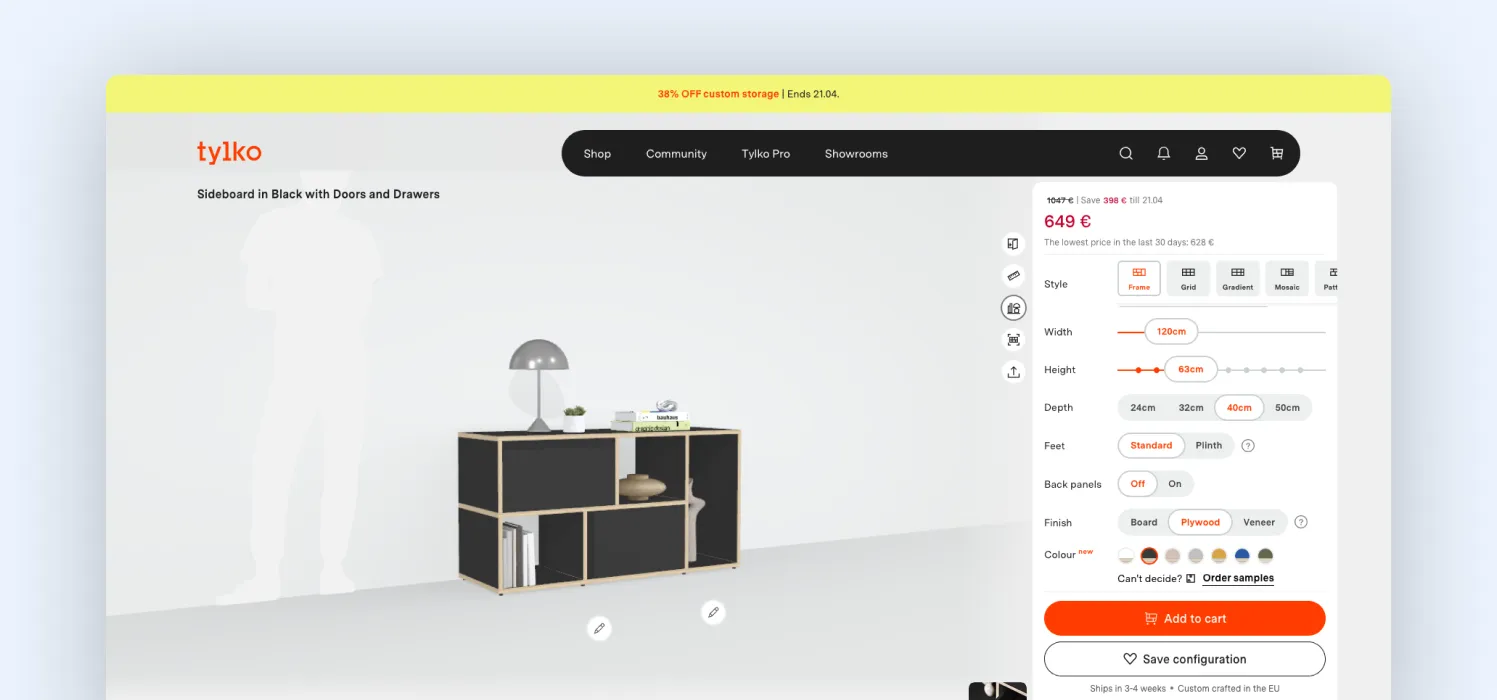
If you’re building this yourself, start by creating the product in a 3D tool like Blender and breaking it into separate components; anything that might change should be its own part. Materials should be set up so colors or finishes can be swapped easily, and variations like size or layout should be prepared in a controlled way.
Once ready, export the model in a web-friendly format like GLB and keep it lightweight so it loads quickly. Then test how it behaves when users interact with it: changing options, rotating, and updating repeatedly.
For photorealism, materials and lighting matter more than just model detail. Surfaces like wood, metal, or gloss need to react naturally to light. Modern rendering technologies like WebGPU help achieve this, especially when the product is updating in real time.
At the same time, more realism makes the model heavier. So the goal isn’t maximum detail; it’s a balance where the product looks realistic but still feels fast and responsive.
Step 6: Connect the configuration logic to the 3D system
Once your 3D assets are ready, the next step is connecting them to your configuration logic so everything works together in real time. At this point, every user action (like changing a color, size, or component) needs to trigger a clear outcome in the 3D model.
In simple terms, you define:
- What the user selects
- What the system allows
- What changes in the 3D model
For each option, you map what should happen. For example:
- a color change → updates the material
- an add-on → shows or hides a component
- a size change → loads the correct version of the model
This is what turns your 3D assets into a working configurator. A good example is Lundia’s shelving configurator. When users change dimensions, the system doesn’t just stretch the model. It recalculates the structure and updates the 3D model so everything remains stable and realistic.
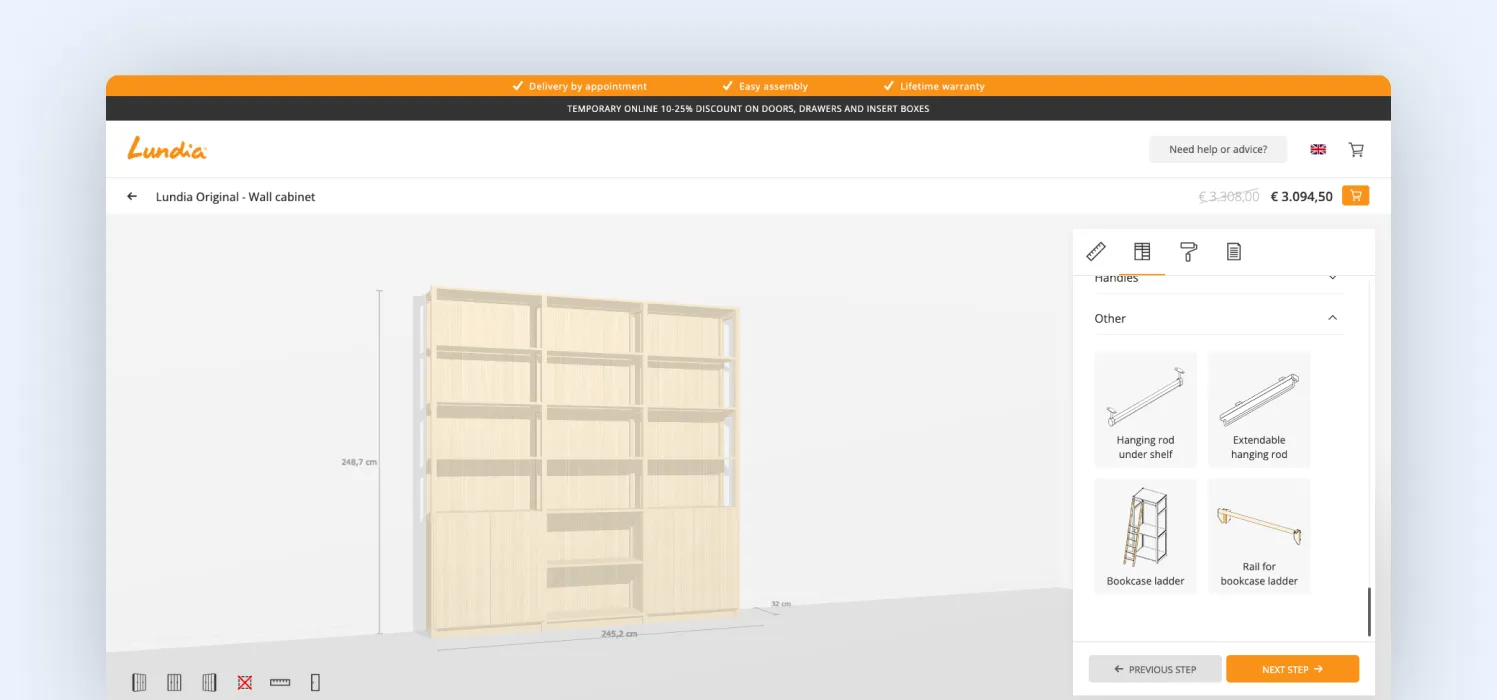
At Magebit, we think of this as the logic-to-mesh connection, where every selection is tied to a specific and accurate change in the model.
For example, in our work with Selfnamed, changing the bottle size doesn’t scale the model. It loads a version designed for that size, so labels fit properly, and proportions stay correct.
Once this mapping is in place, the configurator starts to feel reliable. Every change is immediate, accurate, and consistent, which is exactly what users expect when they’re making decisions.
Step 7: Integrate the configurator with Shopify’s cart and checkout
Up to this point, everything lives in a controlled environment. The moment you connect it to Shopify, you’re working within a system that wasn’t designed for dynamic products.
Shopify expects predefined variants. A configurator doesn’t work that way; it generates a product based on user input. That mismatch shows up quickly.
There’s also a hard constraint: Shopify allows up to 2,048 variants per product, but in a configurator, you can exceed that almost immediately once you combine multiple options. And even before that, you’re limited by how Shopify structures products: variants, options, and SKUs.
So the approach here is not to fit the configurator into Shopify’s variant system. It’s to work around it properly. This can be done when the configurator treats the final product as data, not a predefined SKU.
When a user completes a configuration, you capture everything they selected:
- Product type
- Materials or components
- Custom inputs (like text, size, layout)
- Final price
This data is then passed into Shopify using one of these approaches:
- Line item properties (simplest approach)
Instead of creating new variants, you attach the user’s configuration directly to the product as structured data when it’s added to the cart.
So instead of:
→ Product + Variant
You get:
→ Product + Configuration data
For example, a custom bottle is added with properties like size: 50ml, finish: matte, label: custom.
This works well for simple setups, but it has limits. There’s no strong validation at checkout, and it becomes difficult to manage complex pricing or dependencies at scale.
- Cart transform API (modern approach)
This is where most advanced builds go. Instead of adding a fixed product, you intercept the cart and transform it dynamically based on the configuration. That allows you to:
- Generate the correct price in real time
- Structure the line item properly
- Avoid creating thousands of variants
This is currently one of the cleanest ways to handle configurators on Shopify.
- Draft orders API (for complex setups)
For more advanced or B2B-style configurations, you can generate a draft order directly from the configurator. Here’s how it works:
- User completes configuration
- The system sends full configuration data to the backend
- The backend creates a draft order with correct pricing and details
- The user is redirected to checkout
This gives you full control, especially when pricing is complex, configurations are highly custom, and validation needs to be strict.
Step 8: Make pricing dynamic
Pricing isn’t something you calculate at the end; it’s part of how users make decisions as they go.

If you look at the Tesla configurator in the example above, the price updates instantly with every change. That feedback helps users understand the impact of their choices and adjust accordingly.
To make this work, pricing needs to be embedded directly into your configuration logic, not layered on afterward. Each option (whether it’s a material, size, feature, or custom input) should carry a defined pricing rule (fixed cost, percentage change, or dependency-based adjustment).
As users make selections, the configurator recalculates the total by combining these rules, rather than relying on pre-set variants. This ensures that every change is immediately reflected in the UI, stays consistent with the final cart value, and scales cleanly even as product complexity increases.
Step 9: Launch and optimize
By this stage, everything may work in development. The real test is how it performs in the real world: on mobile, across browsers, and on average network speeds.
Performance matters. If the configurator is slow or laggy, users won’t wait; they’ll drop off. In 2026, this also affects visibility, as heavy 3D experiences can hurt Core Web Vitals.
To handle this, configurators use techniques like Level of Detail (LOD) streaming. Instead of loading a high-resolution model upfront, the system starts with a lightweight version and gradually adds detail as users interact. This keeps the experience fast without sacrificing visual quality.
That’s why tools like Nike By You feel smooth, even with constant updates. The interaction stays responsive, no matter how many changes are happening.
In more advanced setups, performance isn’t the only concern. The same configuration data can also be used beyond the screen to generate production-ready outputs like print files or structured specifications. At that point, the configurator becomes a digital twin of the product, where what users build visually can be used directly for fulfillment.
Step 10: Test and refine it as the core buying experience
At this stage, the configurator is the product page. So testing needs to go beyond basic functionality.
You’re validating:
- How it behaves across devices
- Whether edge cases break anything
- If visuals, logic, and pricing stay aligned
- Whether the overall experience feels intuitive
Think of something like the Porsche configurator. Users rely on it to make real decisions, so it needs to handle a wide range of inputs without confusion or failure.
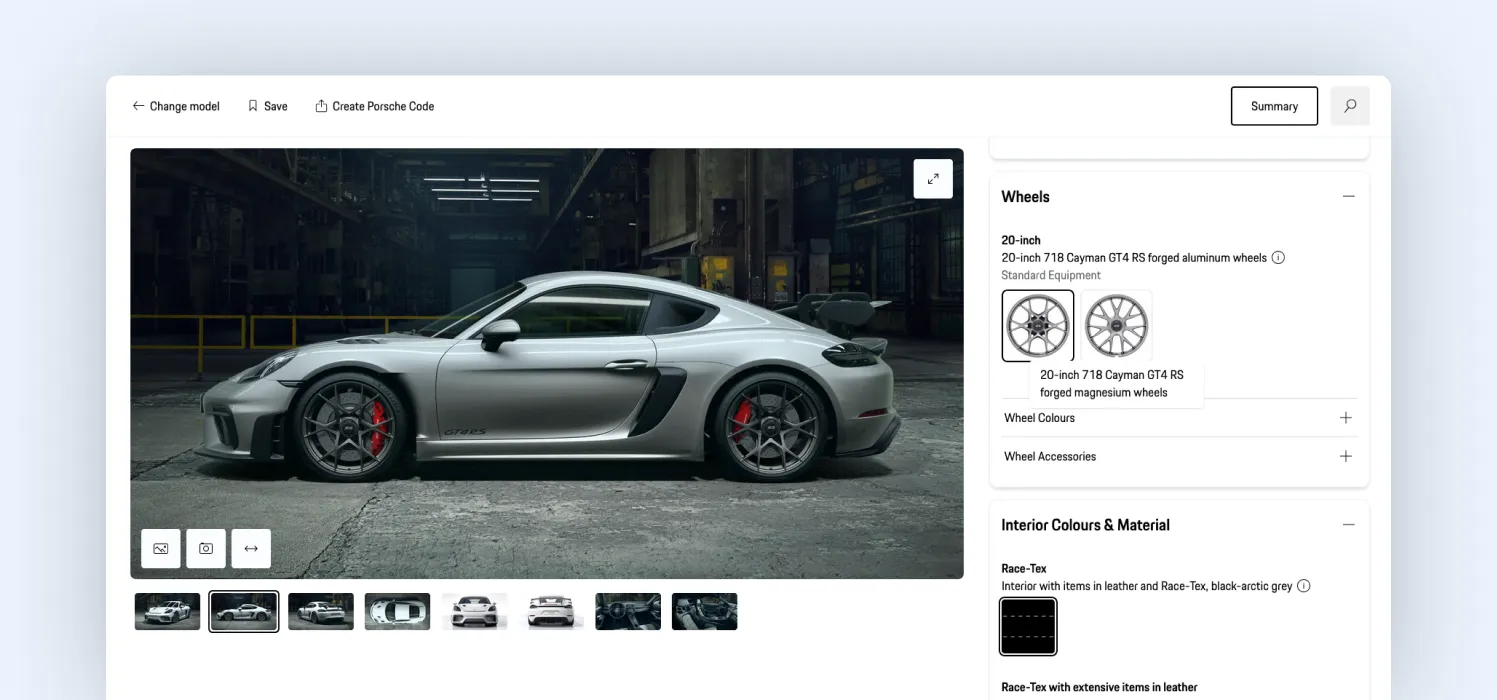
That’s the expectation here as well. And once it’s live, the work doesn’t stop. You start observing how users interact with it: where they hesitate, where they drop off, what they ignore.
Often, the biggest improvements come from simplifying. Reducing steps, clarifying options, and guiding users more effectively. Because in the end, a configurator isn’t about showing everything, it’s about helping users reach a confident decision as smoothly as possible.
Common mistakes to avoid
Even strong 3D configurator projects can underperform if a few critical areas are overlooked. These are the five mistakes we see most often in Shopify builds today.
1. Skipping configuration system design
The biggest mistake is jumping into 3D or tools before defining how the product actually works. Without clear rules, dependencies, and pricing logic, the configurator may look functional but quickly breaks under real use, allowing invalid combinations or creating inconsistencies. A configurator is first a system, then a visual layer.
2. Building 3D assets without performance in mind
High-detail models and large textures might look impressive, but they don’t translate well to real-world usage. Slow load times and laggy interactions, especially on mobile, kill engagement. In 2026, assets need to be built for real-time performance from the start, not optimized later.
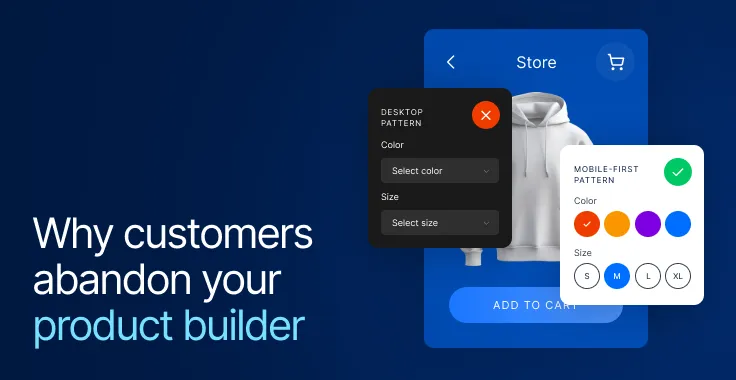
3. Giving users too many options at once
More choice doesn’t mean a better experience. When users are presented with too many options upfront, decision-making slows down and drop-offs increase. The most effective configurators guide users step by step, revealing complexity gradually instead of all at once.
4. Trying to force everything into Shopify variants
Shopify’s native model is built for predefined variants, while configurators generate dynamic configurations. Trying to fit one into the other leads to messy setups, pricing issues, and scalability problems. A configurator should work as a layer on top of Shopify, not be constrained by its default structure.
5. Breaking consistency between configuration, pricing, and checkout
Nothing damages trust faster than a mismatch. If what users configure visually doesn’t match what appears in the cart or checkout, whether in price or product details, the experience falls apart. Every layer, from configuration to final order, needs to stay perfectly aligned.
Key trends in 3D configurators
With new incoming technologies, the world of 3D configurators is also witnessing new trends every year. Two of the strongest ones we see now are:
1. Beyond the screen: AR and spatial commerce

AR is no longer a novelty; it’s becoming a practical extension of the configurator. Once a product is configured, users expect to:
- Place it in their environment using Augmented Reality
- View it at true scale
- Validate decisions in a real-world context
Technologies like USDZ and WebXR are enabling this, allowing configured products to be exported and viewed in real space. For categories like furniture and interiors, this is quickly becoming a competitive advantage.
2. AI is moving configurators from static to adaptive systems
AI is no longer just an add-on. It’s starting to shape how configurators behave. We’re seeing early adoption of:
- AI-assisted configuration, where users can describe what they want and see it generated instantly
- Smart defaults and recommendations, based on user behavior or popular combinations
- Automated design adjustments, such as aligning text, scaling layouts, or improving visual balance
Instead of manually building every combination, AI helps reduce effort on both sides, guiding users and simplifying complex configurations.
Final thoughts
If there’s one thing this guide makes clear, it’s that a photorealistic 3D configurator is not a visual upgrade; it’s a complete product and commerce system.
From defining configuration logic to building modular 3D assets, from guiding user decisions to ensuring seamless Shopify checkout, every layer needs to work together. When done right, the configurator doesn’t feel like a feature; it becomes the primary way users understand, customize, and purchase the product.
At Magebit, this is exactly how we approach product configurators. We’ve worked with dozens of companies like Selfnamed, Dunkin', MerchHouse, and Daimler to create custom product builders that have been in use for several years now. If you would like to learn more about them, get in touch with a Magebit expert.

Free tips to grow your store
eCommerce related news
New articles every month
Macaroni and cheese recipes
Check your inbox for tips.